TL;DR
Moving your rig into a closet or small space can drastically reduce noise, but ventilation is key. Acoustic absorption inside the closet improves sound quality, while proper placement and sealing prevent sound leakage. Combining these tactics makes tiny spaces surprisingly professional.
Imagine your workspace, quiet and focused, even if your computer or audio rig roars behind closed doors. It sounds almost magical, but it’s often just smart placement and simple acoustic tricks. The secret isn’t just foam — it’s about where you put your gear and how you treat that space.
Whether you want a silent home studio or reduce noise for a shared apartment, these tips will help you turn a tiny closet into a professional-sounding booth. You’ll learn why moving your rig away can be the biggest win, how to treat small rooms effectively, and why sealing the door can make all the difference.
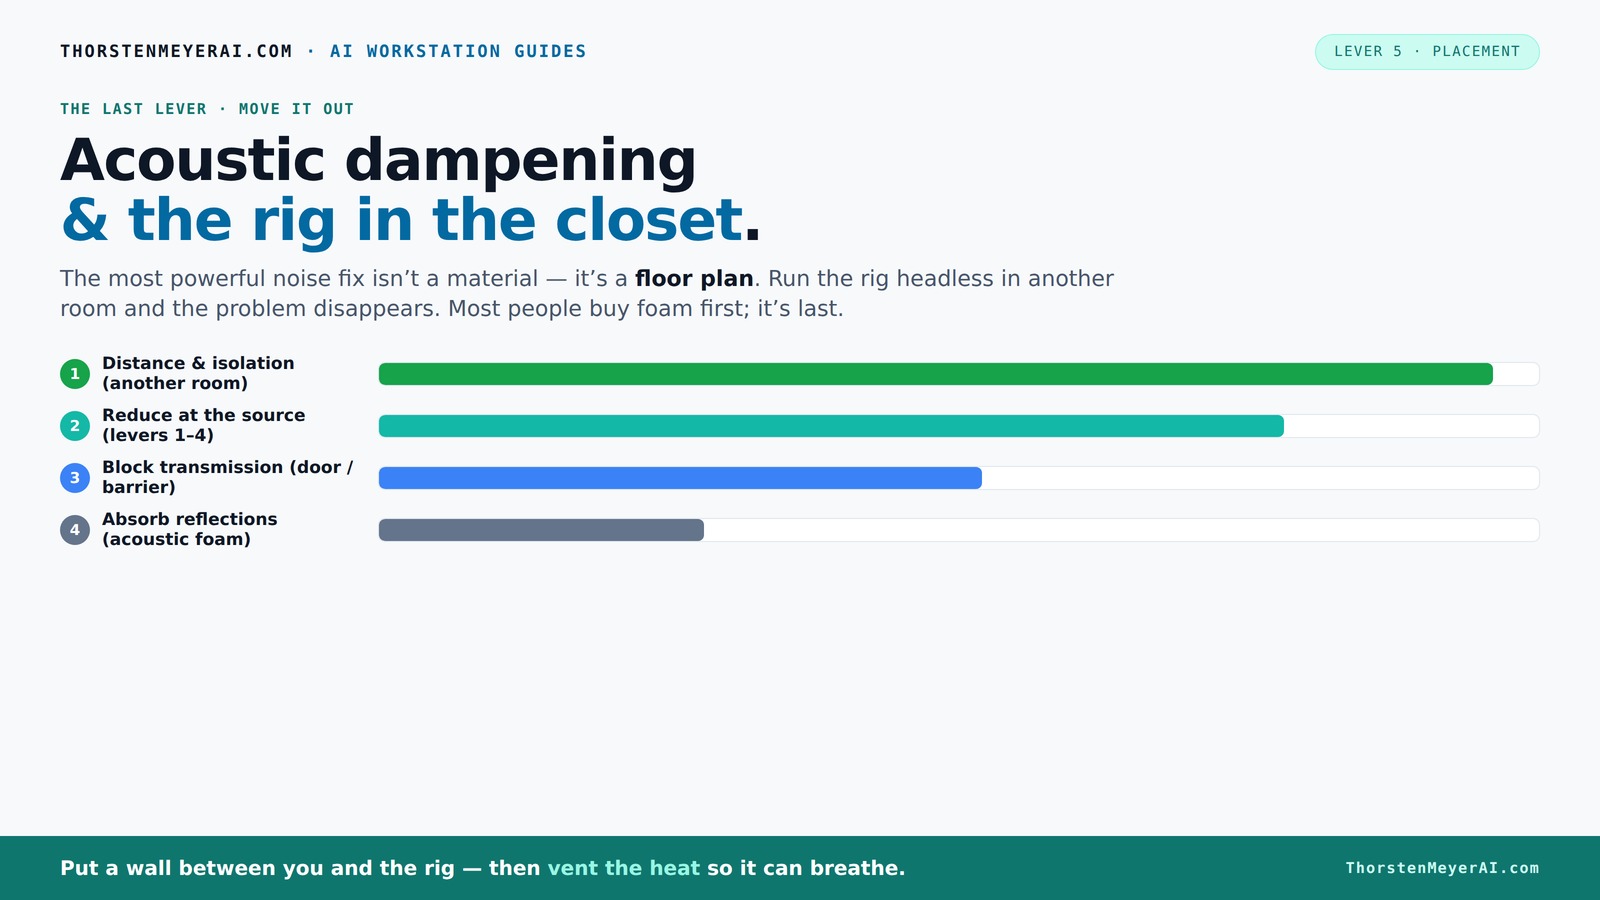
Acoustic dampening
& the rig in the closet.
The most powerful noise fix isn’t a material — it’s a floor plan. A rig you can’t hear because it’s in another room beats any amount of foam. Tap the approaches in Part 1 to see what actually works.
(another room)
(levers 1–4)
(door / barrier)
(acoustic foam)
Contain the noise, not the heat
Key Takeaways
- Moving your rig into another room or closet is the most effective noise reduction method.
- Proper ventilation is crucial — ensure airflow to prevent overheating in sealed spaces.
- Broad wall coverage with acoustic materials improves sound quality more than corner-only traps.
- Seal gaps around the closet door and use dense materials to prevent sound leaks.
- Position your microphone facing treated walls or reflection points for cleaner recordings.
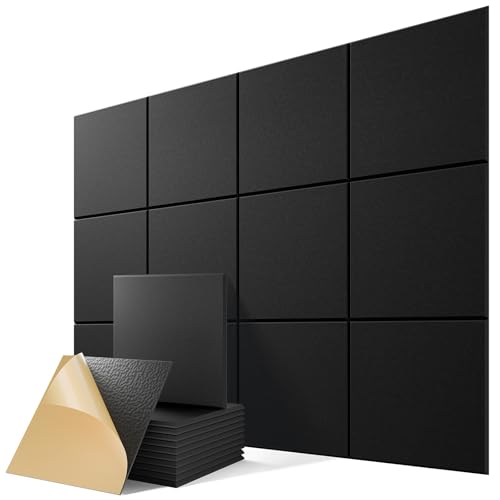
12 Pack Self-Adhesive Acoustic Panels, 12" X 12" X 0.4" High-Density Sound Proof Foam Panels for Walls, Soundproof Wall Panels for Home & Office (Black)
- Effective Noise and Echo Reduction: Absorbs noise and minimizes echo
- Easy Peel & Stick Installation: Quick DIY setup without tools
- High-Density Acoustic Foam: Eco-friendly material for lasting sound control
As an affiliate, we earn on qualifying purchases.
As an affiliate, we earn on qualifying purchases.
Why Moving Your Rig Is the Fastest Way to Quieter Sound
The biggest leap in noise reduction isn’t soundproofing — it’s distance. Placing your high-power rig in another room, like a closet or basement, instantly cuts noise levels. Your laptop or interface stays on your desk, while the loud machine lives elsewhere, unreachable by sound waves.
Why does this matter? Because sound intensity diminishes rapidly with distance, thanks to the inverse square law. This means that even moving a few feet away can significantly reduce perceived loudness, often more effectively than layering multiple soundproofing materials. It also simplifies your setup, avoiding complex and costly soundproofing tricks. The tradeoff is convenience — you need to ensure your remote setup is reliable and that you have good control over your equipment from afar.
Imagine working late at night, hearing nothing but your keyboard and a whisper of air. That’s the power of relocating your setup. With a wired connection or robust Wi-Fi, you can control your AI models from a cozy, quiet corner, while your noisy rig roars in the background.
This approach is especially perfect for AI inference rigs, which don’t need to be right next to you. They can sit behind a sealed door or in a closet, making your workspace silent and stress-free.
The 'Rig in the Closet' Setup: Ventilation and Heat Management
Putting a hot, powerful computer in a closet may seem like a quick fix, but heat is a silent killer. Without proper airflow, your machine will overheat, throttling performance and making fans scream. That defeats the purpose of quiet.
Proper ventilation isn’t just about comfort — it’s about preventing hardware failure. Overheating can cause thermal throttling, which reduces your system’s performance just when you need it most. Additionally, high temperatures can shorten component lifespan. The goal is to create a balance: provide enough airflow to keep the system cool without introducing noise that defeats your acoustic goals. Using passive vents allows hot air to escape naturally, but they need to be positioned carefully to avoid letting sound leak out. Quiet exhaust fans can be installed to actively pull hot air while operating at low noise levels. Some DIY builders incorporate ducting or small AIO liquid cooling radiators outside the closet, which export heat more efficiently without adding noise inside the space.
Consider the example of a user who built a custom soundproof cabinet with an active ventilation system. By integrating low-noise fans and controlled airflow, they kept the room cool while maintaining a noise level below 40 dB. The key is to ensure the space breathes—if the airflow is restricted or poorly managed, your equipment risks overheating and performance drops. The tradeoff involves balancing cooling efficiency with noise isolation, but with thoughtful design, both can be achieved.
Want to see real-world solutions? Check out this guide on reducing heat and noise in high-power rigs.
Acoustic Dampening Inside the Closet: Absorption Beats Soundproofing
Acoustic dampening materials inside your closet mainly improve sound quality, but they also help in reducing noise escape. Foam panels, blankets, and rugs soak up reflections, making sounds less echoey and less loud. This is crucial because small spaces tend to amplify sound reflections, creating a boomy or muddy audio environment. Proper absorption prevents these reflections from bouncing around and reaching your microphone or ears, resulting in clearer recordings and monitoring.
Research shows that broad wall coverage and thick materials matter more than just sealing cracks. Covering 60–80% of the walls with acoustic foam or blankets can cut echo and reverb significantly. For example, a musician turned home producer used thick blankets to line her closet, reducing echo by over 50%. The key is to treat as much surface area as possible, especially at reflection points, to tame the room’s acoustic footprint.
But don’t rely solely on foam. Combining absorption with sealing gaps around the door and walls prevents sound leakage. Use dense materials like moving blankets or acoustic panels behind the mic and at reflection points. This layered approach ensures that sound is absorbed and contained, not just diffused or reflected.
Want a quick DIY tip? Hang thick blankets over the door and along the walls, then add foam panels at key reflection points. It’s a cost-effective way to tame a tiny space while significantly improving sound quality.
Where to Treat in a Tiny Closet: Walls, Corners, and Reflection Points
In small rooms, placement of acoustic treatment is critical. While many focus on corners for bass traps, wall coverage and reflection points often make a bigger difference. Treating only the corners may help control low frequencies, but mid and high frequencies tend to bounce around the entire space, causing muddiness and echo. Therefore, broad coverage on walls and ceiling is essential to achieve a balanced sound.
Start by identifying your microphone and listening position. Use a mirror or flashlight to spot where reflections bounce into your ears. Place absorption panels there. For example, if your mic is against the back wall, treat the wall behind and behind the mic, plus the side walls at reflection points. This prevents early reflections that can muddy recordings. Additionally, addressing the ceiling and floor with hanging bass traps or rugs helps prevent sound bouncing downward or upward, which can cause phase issues and muddiness.
Corners are still important for low-end buildup, but broad wall coverage controls mid and high frequencies better. A DIY closet studio with panels covering 50% of the walls and some bass traps in the corners sounds much clearer than one with only corner treatment. The goal is to reduce early reflections and diffusions across the entire space, not just focus on low frequencies.
Pro tip: Use a simple mirror trick to find your reflection points—sit at your recording spot, hold a mirror along the walls, and see where the mic's reflection shows. Mark those spots and treat them. This targeted approach ensures you’re addressing the most problematic reflections, leading to a cleaner sound.
Sealing the Closet Door and Gaps: Stop Sound Leaks Cold
The closet door is often the weak point in noise control. Gaps around hinges, handles, or a loose seal let sound escape, defeating your efforts inside. These gaps can be surprisingly large in terms of sound transmission, especially at high frequencies, which easily escape through small openings.
Seal gaps with weatherstripping, draft stoppers, or acoustic door seals. For instance, a home studio builder added self-adhesive weatherstripping around his closet door, dropping noise leakage by 70%. Using a dense, mass-loaded curtain or moving blanket over the door also works well, adding mass and reducing sound escape. It’s important to understand that the more airtight your seal, the more effective your treatment becomes, as sound waves have fewer pathways to leak out.
In some cases, replacing a hollow door with a solid core or adding an acoustic door can cut sound transmission significantly. Remember: a well-sealed door doesn’t just contain sound; it also helps maintain consistent acoustics inside the space, preventing external noise from intruding and internal noise from escaping. The tradeoff might be cost or effort, but in small rooms, sealing gaps is one of the most cost-effective ways to improve isolation.
Small Spaces Need More Than Just Foam — Cover Walls, Not Just Corners
In tiny closets, relying solely on corner traps is a mistake. Walls and reflection points matter more. Covering 50–80% of the walls with soft, thick materials dramatically improves sound clarity because it reduces the amount of sound bouncing directly back into your mic and ears. This broad coverage prevents flutter echoes and reduces mid to high-frequency reflections that cause muddiness.
For example, a YouTuber used a combination of foam panels, blankets, and rugs, covering nearly all walls. The result? A clear, controlled sound with less echo and low-end muddiness. This approach shifts the acoustic treatment from a focus on just bass management to comprehensive room control. It’s about creating an environment where sound can be captured accurately and listened to clearly.
Don’t forget to treat the ceiling and floor if possible. Use hanging bass traps or thick rugs to prevent sound bouncing around. Small but broad coverage beats focusing only on corners because it addresses the overall acoustic environment, leading to more natural and balanced recordings.
Mic Placement in a Small Room: Facing or Away from Treatment?
In tight spaces, mic placement matters more than you think. Usually, pointing the mic away from reflective walls reduces echo and captures cleaner sound. Proper placement minimizes the room’s influence on your recordings, especially in small, reflective environments where sound waves bounce aggressively.
For example, a singer placed the mic facing a treated wall at a 45-degree angle, cutting reverb and echo significantly. Experiment with angles and distances — sometimes a few inches can make a huge difference. Moving the mic slightly can change the balance between direct sound and room reflections, leading to a clearer recording.
Pro tip: Use a reflection filter or a shield behind the mic to block unwanted reflections. The goal is to position your mic where the room sounds best—usually facing away from untreated walls and toward treated surfaces. This strategic placement can make your small space sound much more professional without extensive treatment.
Frequently Asked Questions
What is the main difference between acoustic dampening and soundproofing?
Acoustic dampening reduces echo and reflections inside a room, making the sound clearer. Soundproofing blocks sound from escaping or entering, preventing noise leakage. In small spaces, absorption improves sound quality, while sealing gaps stops leaks.
Where should I place foam or panels in my closet studio?
Place panels at reflection points—behind the mic, on side walls, and ceiling. Covering about 50–80% of surfaces helps tame echo. Use a mirror trick to find reflection points, and focus on broad wall coverage for best results.
Do I need bass traps in a tiny closet studio?
Yes, especially if you notice low-end muddiness. Bass traps in corners help control low-frequency buildup caused by parallel walls. For small spaces, broad coverage with bass traps makes a noticeable difference in clarity.
How do I stop sound from leaking through the closet door?
Seal gaps with weatherstripping or acoustic door seals. Using a heavy curtain or blanket over the door also helps. Replacing hollow doors with solid core doors or adding an acoustic door can provide even better isolation.
Can a closet studio sound professional or is it just for demos?
With proper treatment, broad coverage, and good mic placement, a closet can produce surprisingly professional sound. While it may not replace a dedicated studio for high-end work, it’s excellent for demos, podcasts, and casual recording.
Conclusion
The secret to a quiet, professional closet studio isn’t just foam or fancy gear. It’s smart placement, broad acoustic coverage, and thoughtful ventilation. These simple tweaks can turn a tiny, noisy closet into a space that sounds just as good as a dedicated studio.
Remember, sometimes the biggest noise reduction comes from moving your rig away from your ears. Think about where your gear sits, how you treat that space, and how you seal it. Your future self will thank you every time you hit record or start a call — silent, cool, and ready to go.